Monday 24 August 2015

Harvest time

Spinach, courgettes and potatoes.  Now that sound like a good harvest to me.  Considering we only started this year just imagine how well we'll do next year once to allotment is better lay and planed out.  I think that it will begin to look even better.
Image 1

Out of all the potatoes only one was beyond saving once I'd cleaned them with salt water.  still that ok, could even still use the potato in mash if you wanted.

Image 2

The shed has arrived

That's right people the shed has arrived finally and how cool does it look.  Now that this is on the allotment it's going to make life so much easier than before.  No more carrying tools over in the wheelbarrow, then taking them back home.  Now I can leave them on the allotment site which I can tell you was a real relief on Sunday.  Trust me when I say it can be a real headache every time you need to go down but know you have to carry/ wheel your tools over.  No more.

Image 1

Still a lot of work to go but beds shed and weed dying off is a great start.  Next we will once the weed have died off will use a Rotavator to turn over the soil.  All the top half was done by hand but it's such hard work trust me.   
Image 2

Turning and hoeing soil

In the three images below you can see how I've the soil looks once you've turned it over with a fork and hoe.  This I've been told is to get air into the soil as well as remove any weeds that may have started to grow. 
Image 1

In image 1 you may see that we've started to harvest the potatoes which have given us a beautiful crop.  The potato plants have also really broken the soil up making it nice a soft.  This was easy to to turn. Now all you have to remember for next year to not plant any root vegetables.  We will have to wait about three as you need to have s system of rotation when grow vegetables.

Image 2
Bed 2 was so much easier to work now that is has been sectioned off.  You only have to turn thee area in the box.  Also it's easier to remember where you left off if you go away for a drink.

Image 3
Also with the bed system it is also easier to now where you left off and so when down the allotment next time, you know where to start.  Bed three is where I will start on Wednesday.

Monday 10 August 2015

Growing bed completed

Now the allotment is really starting to come together with nice sized beds and an easy to use path.

Image 1

Will lay down some weed suppressant sheets next then cover with the wood chippings.
Image 2

Image 3

Will post the images of the completed path when finished.

Any ideas

This is a little unusual that I found from under the soil.   Not sure if it's just something that bas been growing or just something buried by someone else.  Who knows.

Image 1

Finishing around compost

Finally got the compost de weeding done.  Here you can see how I've dug round the compost turning over the grass and plants to dire out in the sun. 

Image 1

Image 2

Image 3

Image 4

Image 5

Image 6

Image 7


Growing courgette marrow

Beening growing some big Courgettes for baking in the oven
Image 1

 Image 2

Nice and Marrow this one is below.  Looking forward to roasting this one in the oven with some mince and veg.
Image 3

Image 4

Monday 3 August 2015

Clearing round the compost bin

So now all that is left to do fro the top half is the compost bin.  You may be able to notice from the image that the weeds and grass have started to grow very large.  This area is small around the compost but the other half of the allotment is a lot more over grow.
Image 1

Image 2

Didn't get very far on this day but will finish if off next time when down.  See how I've turned the grass over so that in the sun it will kill the grass off.  The same as when digging up the weeds.  Leave them in the sun to dry out.

Image 3

Image 4

New growing beds set up.

Ok then the area that I've been clearing out is starting to take shape with a new bed and another one not yet complete.  Trying something different here with square beds a little wider than the second bed.
Image 1

As you can see these beds won't be as easy to reach the middle but they do break the allotment up nicely.

Image 2

Also we are going to us a weed suppressant sheet which is a meter wide.  So it will fit between the beds just nice.

Image 3

Monday 27 July 2015

courgettes magic

Take a look at this beauty.  Don't know where this courgette came from but I've been a little busy the last couple of days so have been unable to head down to the allotment and check on the plants development.  So this guy really shot out of nowhere for me on Sunday.  Really looking forward to cooking this bad ass elite
In the future I'll probably look into video's to show how and what I end up using/ cooking out of the veg fruit I grow.  Till then I'll leave you this image of a big juicy courgette.  
Image 1

One other thing to mention about courgettes is that it is better to pick the courgette once it has ripened or about 10mc long.  You don't need to measure them for the length just a rough guess will do.  However picking about so I read and been told three times a week help the plant throughout the year.  Keeping the plant strong and healthy.  So always keep an eye on the courgette.  

Potato's flower slowing dying

OK so I noticed this on Sunday if you can see the flowers starting to die so this hopefully could mean that the potato's are getting ready to harvest.  However there has been  something going around the allotment this year.

Image 1

But as you can see there is little sign showing of the plants wilted or that the leafs turning yellow.  That gives me a good feeling for our first potato crop.  I asked a fellow allotment grower on what he thought of the potato flower.  I've always been told that you should wait for the flower to completely die out.  That is the sign that it's ready to harvest.  So next time down the allotment I have a look and maybe I'll have potato's.

Image 2

Still levelling off the grown

So little to report apart from the levelling off of the allotment.  Still removing weeds as well as that never seems to end.  Also the rain started to come down on Sunday so hopefully I'll get the image to show how I've done so far.

Image 1 

Again with the weed just dig them all out and leave in the sun to dye out.

Image 2 


Image 3 

In image four you may just be able to see how the grown dips but it's not clear.  This however is the big job at the moment.  Once the whole area is complete and levelled off  the start to put in some more bed and lay out the paths.  

Image 4 

Image 5

Wednesday 22 July 2015

Bed netting frame

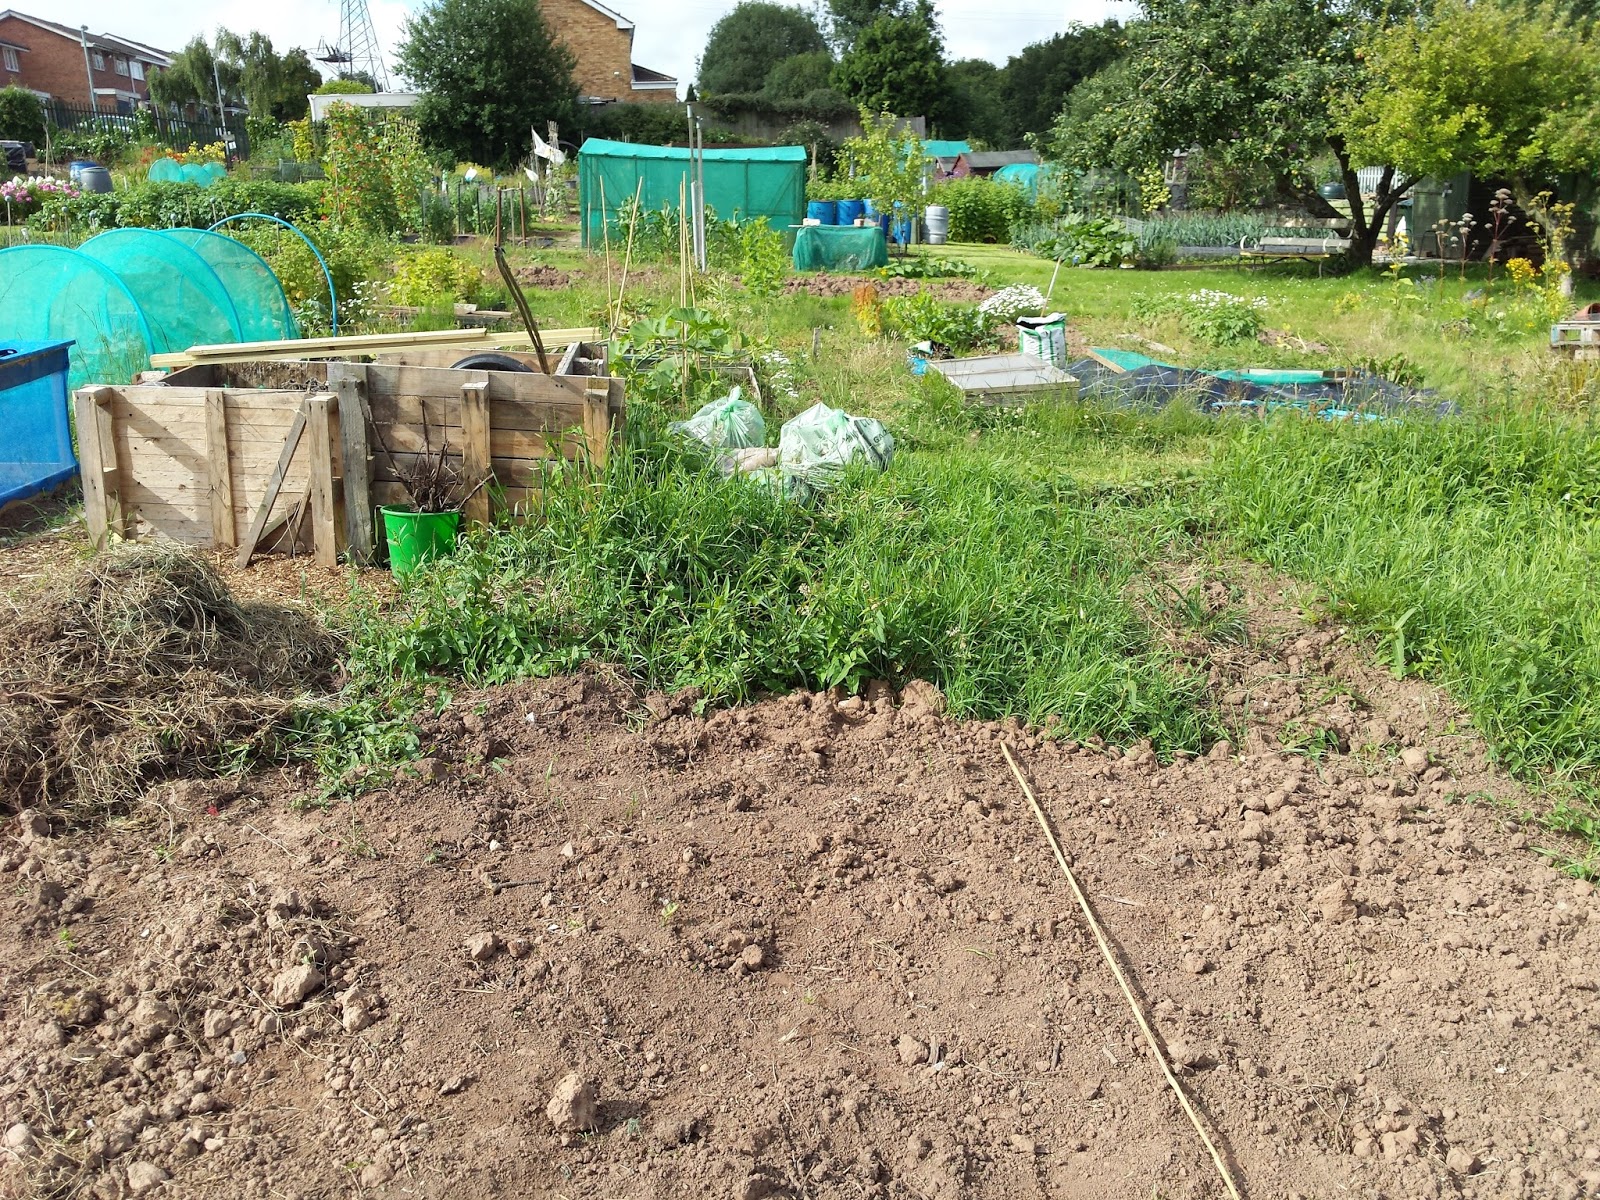
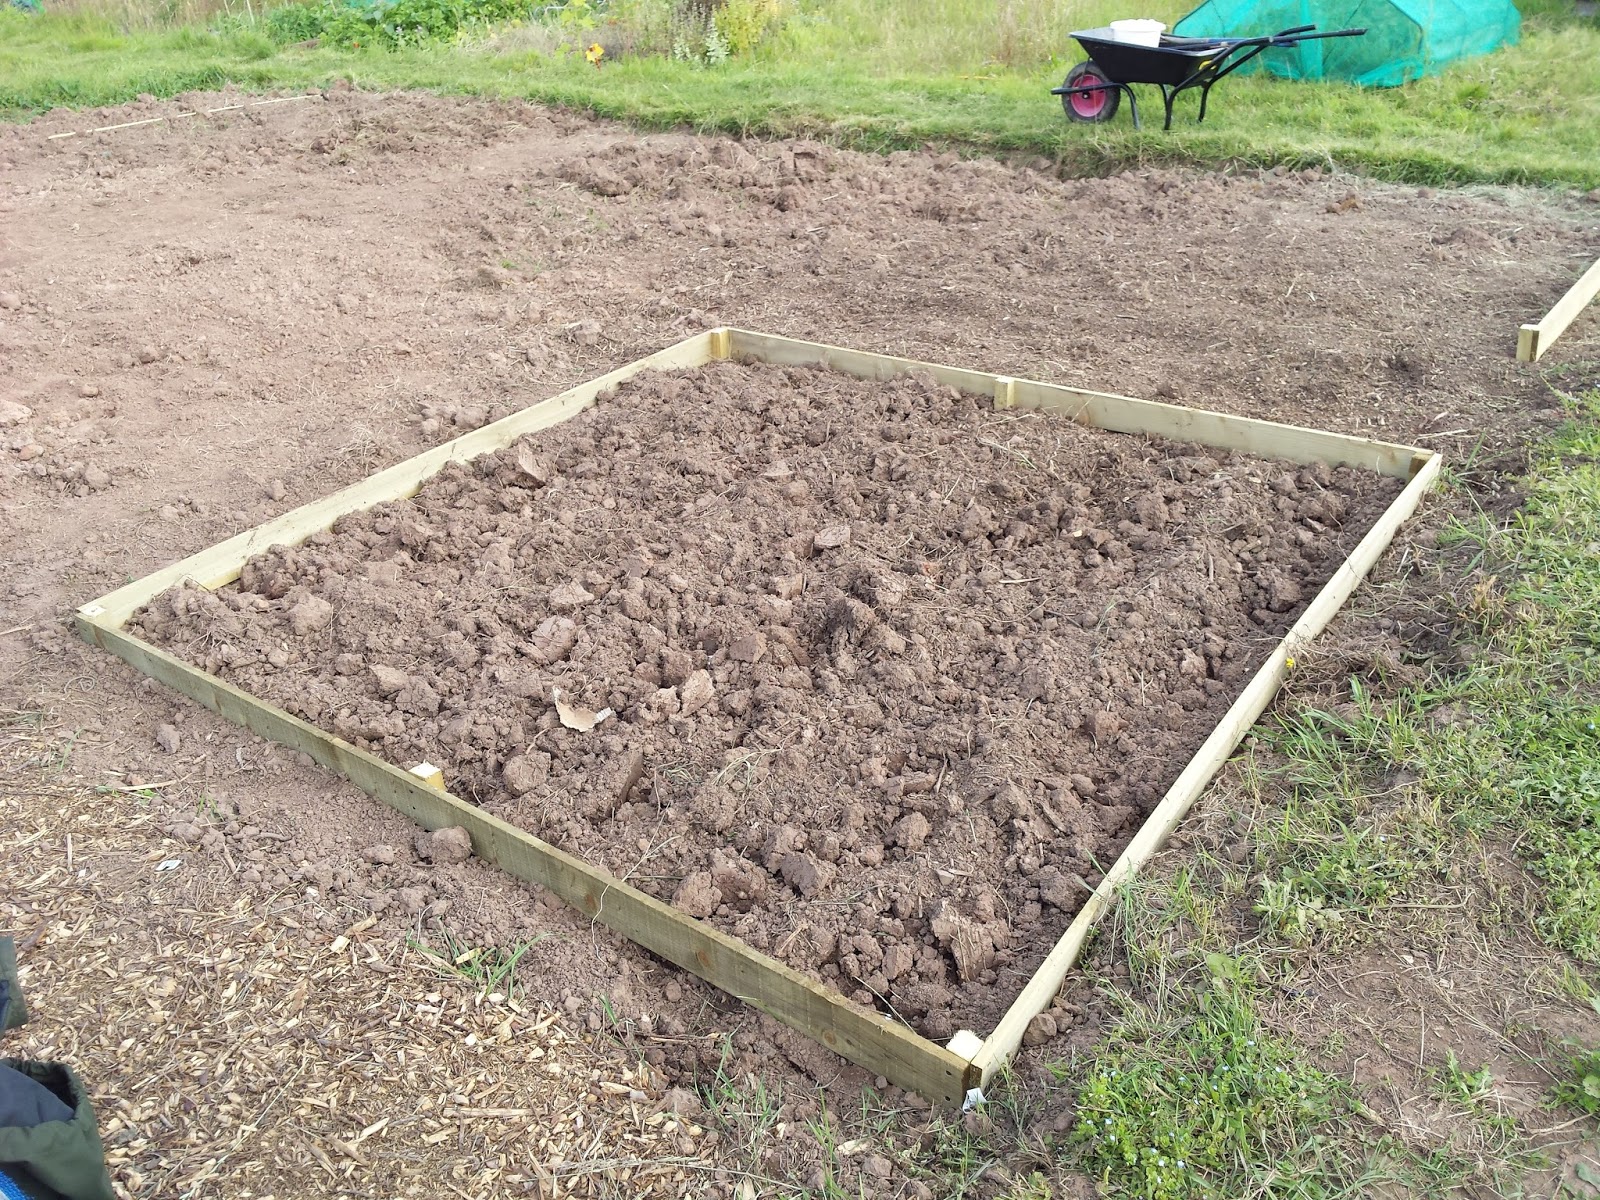
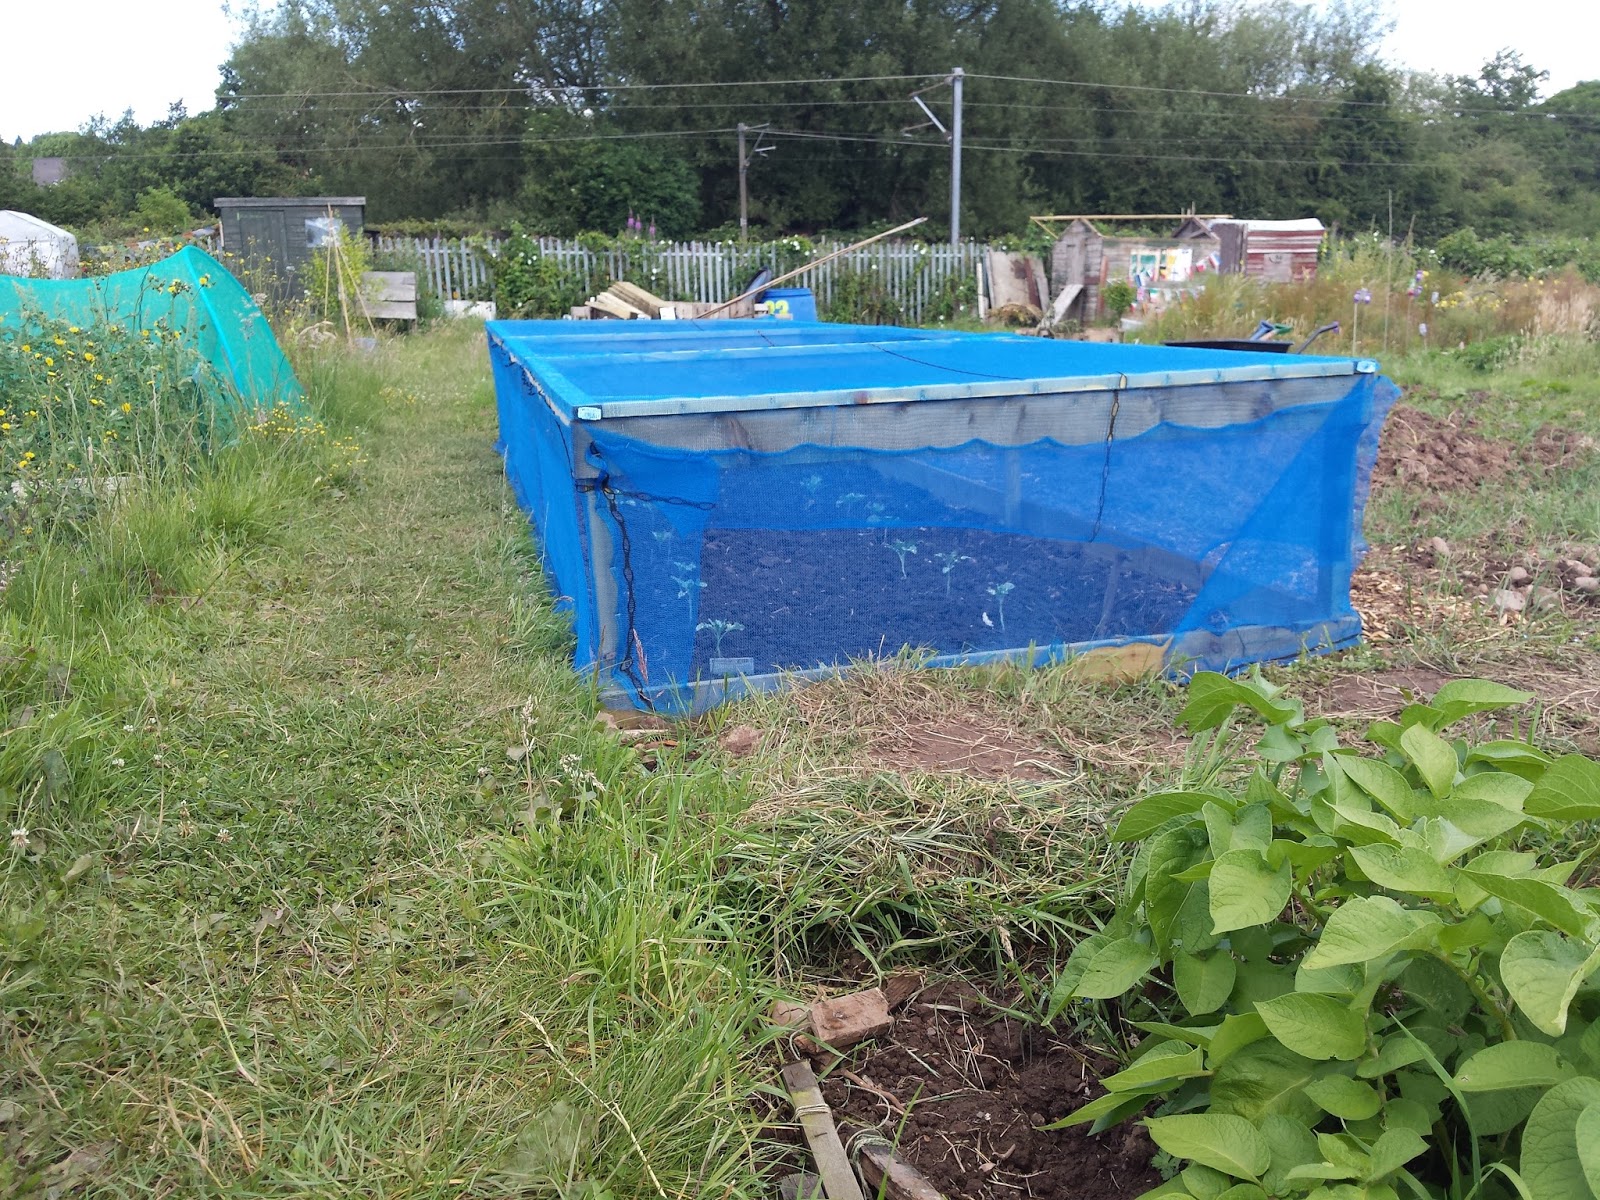
Ok here you can see the frame for the netting over the new growing bed, growing bed one.  Best to use a weather treaded timber if you want to be able to use this again for many years to come. 
Image 1

This won't stop weed but the birds have got no chance.  The frame it self has been design so that we can move it over to the next bed, for two reasons.  One is to cover what we grow on all beds as it can be pick up and move onto the next, for growing rotation.  Two is so that as we need to propare the soil for planetation it will allow us to work the soil without hindrances.  

Image 2

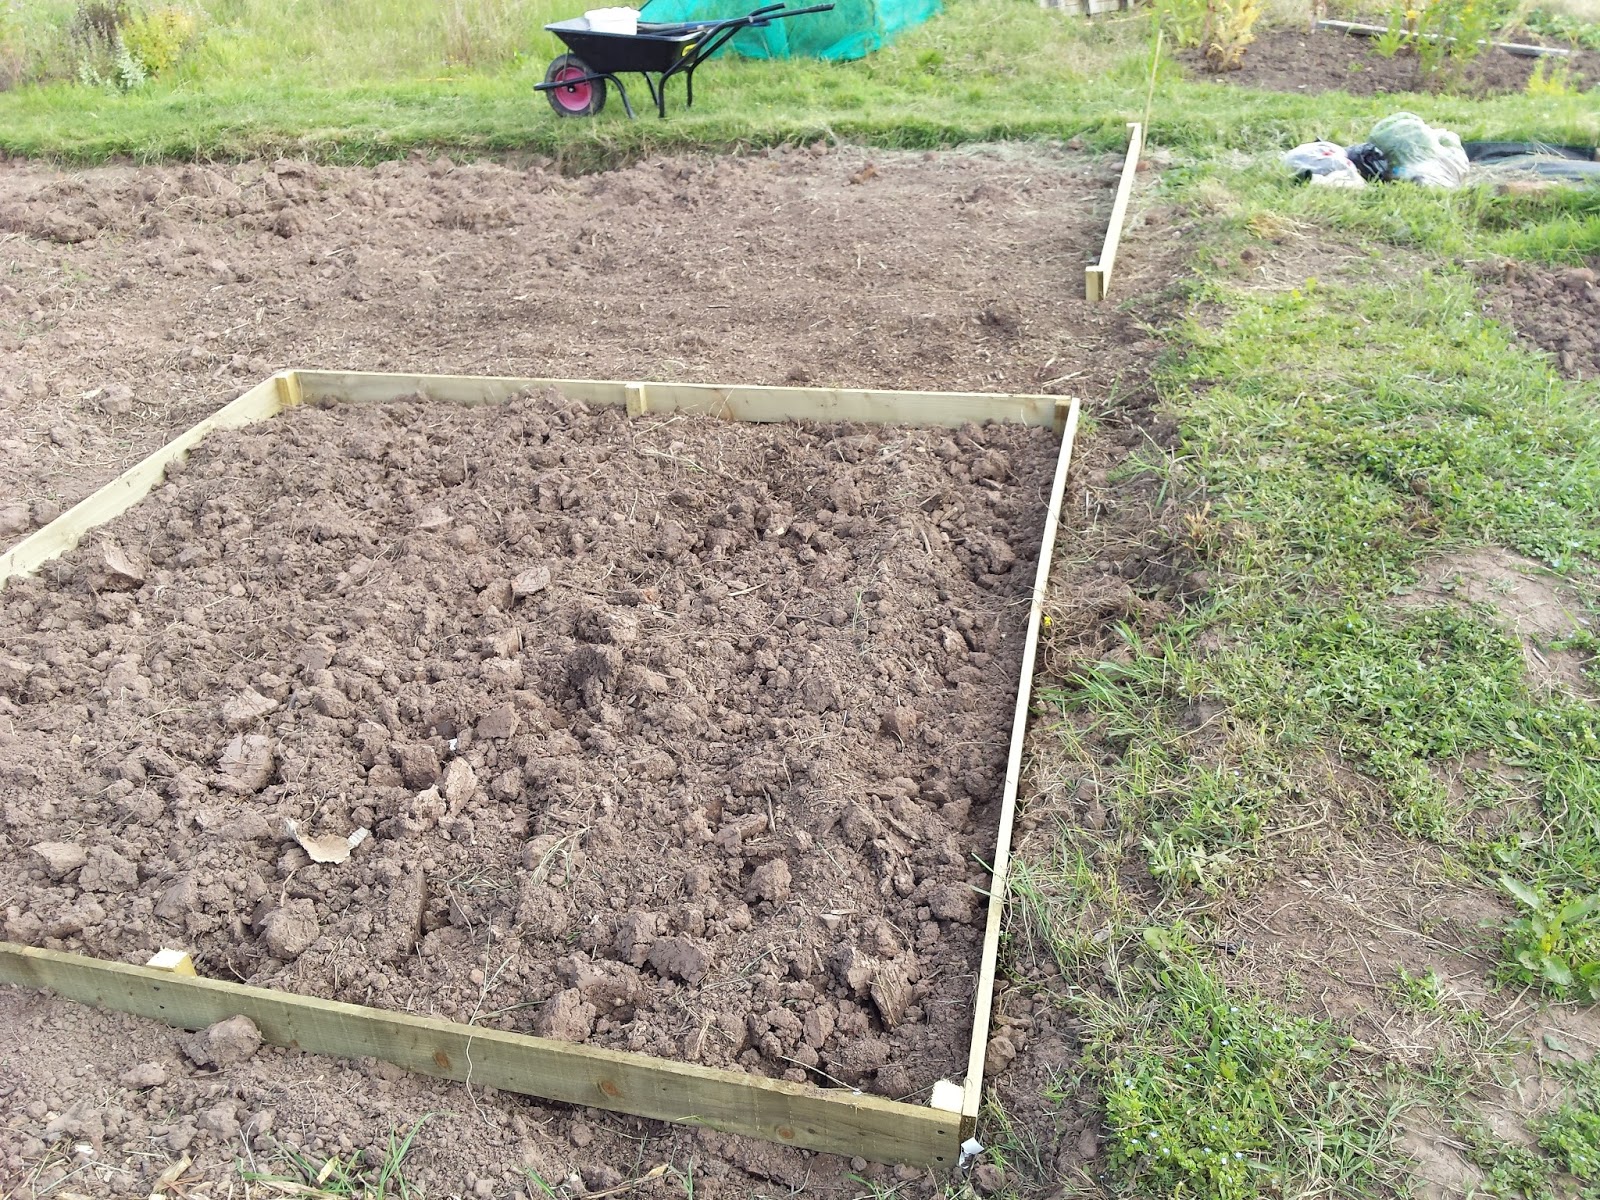
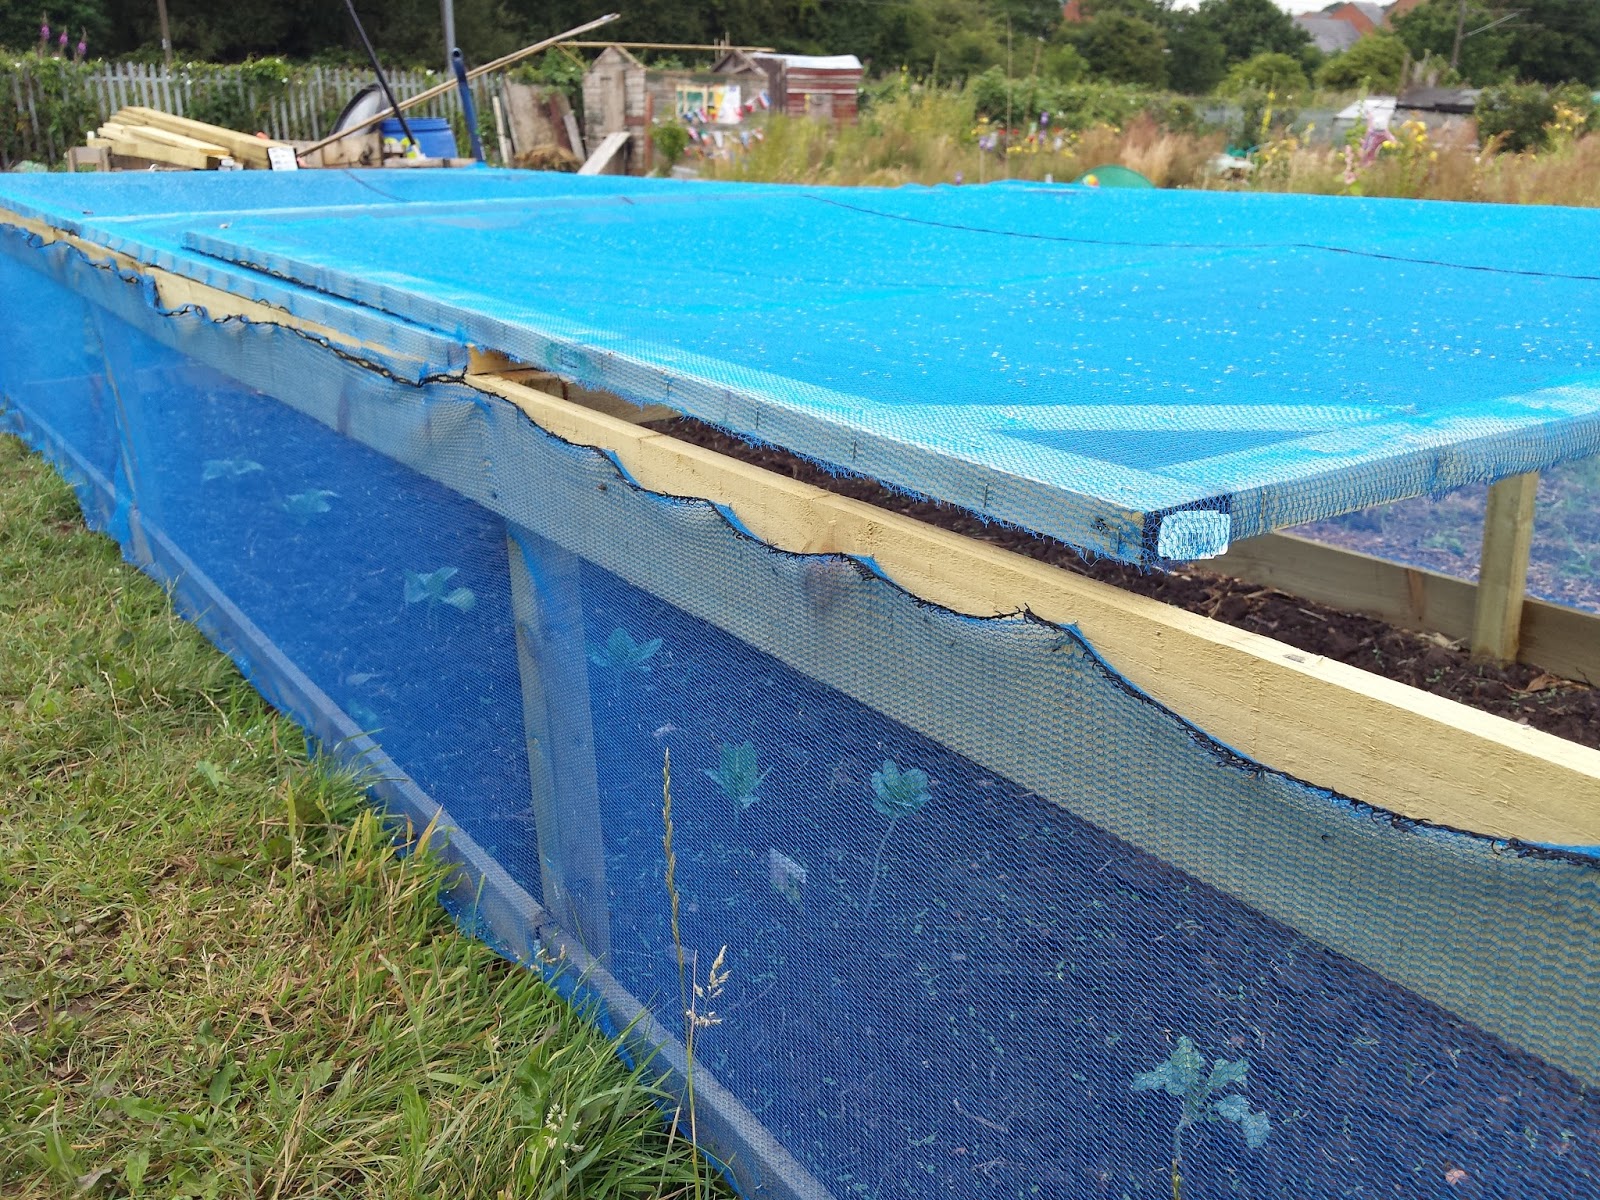
The frame is very simple, the main body is lengths of treated wood connect by beams strengthing the frame.  Not too sure how this will work when the wind builds up come autumn and winter.  The lead is again very simple beams of treated timber with another beam bridgeing the edges together.  That helps to strenghten the top frame when lifting it up.  There are three top frames to make it easier to lift up and reach into the bed.

Image 3

Image 4

Image 5

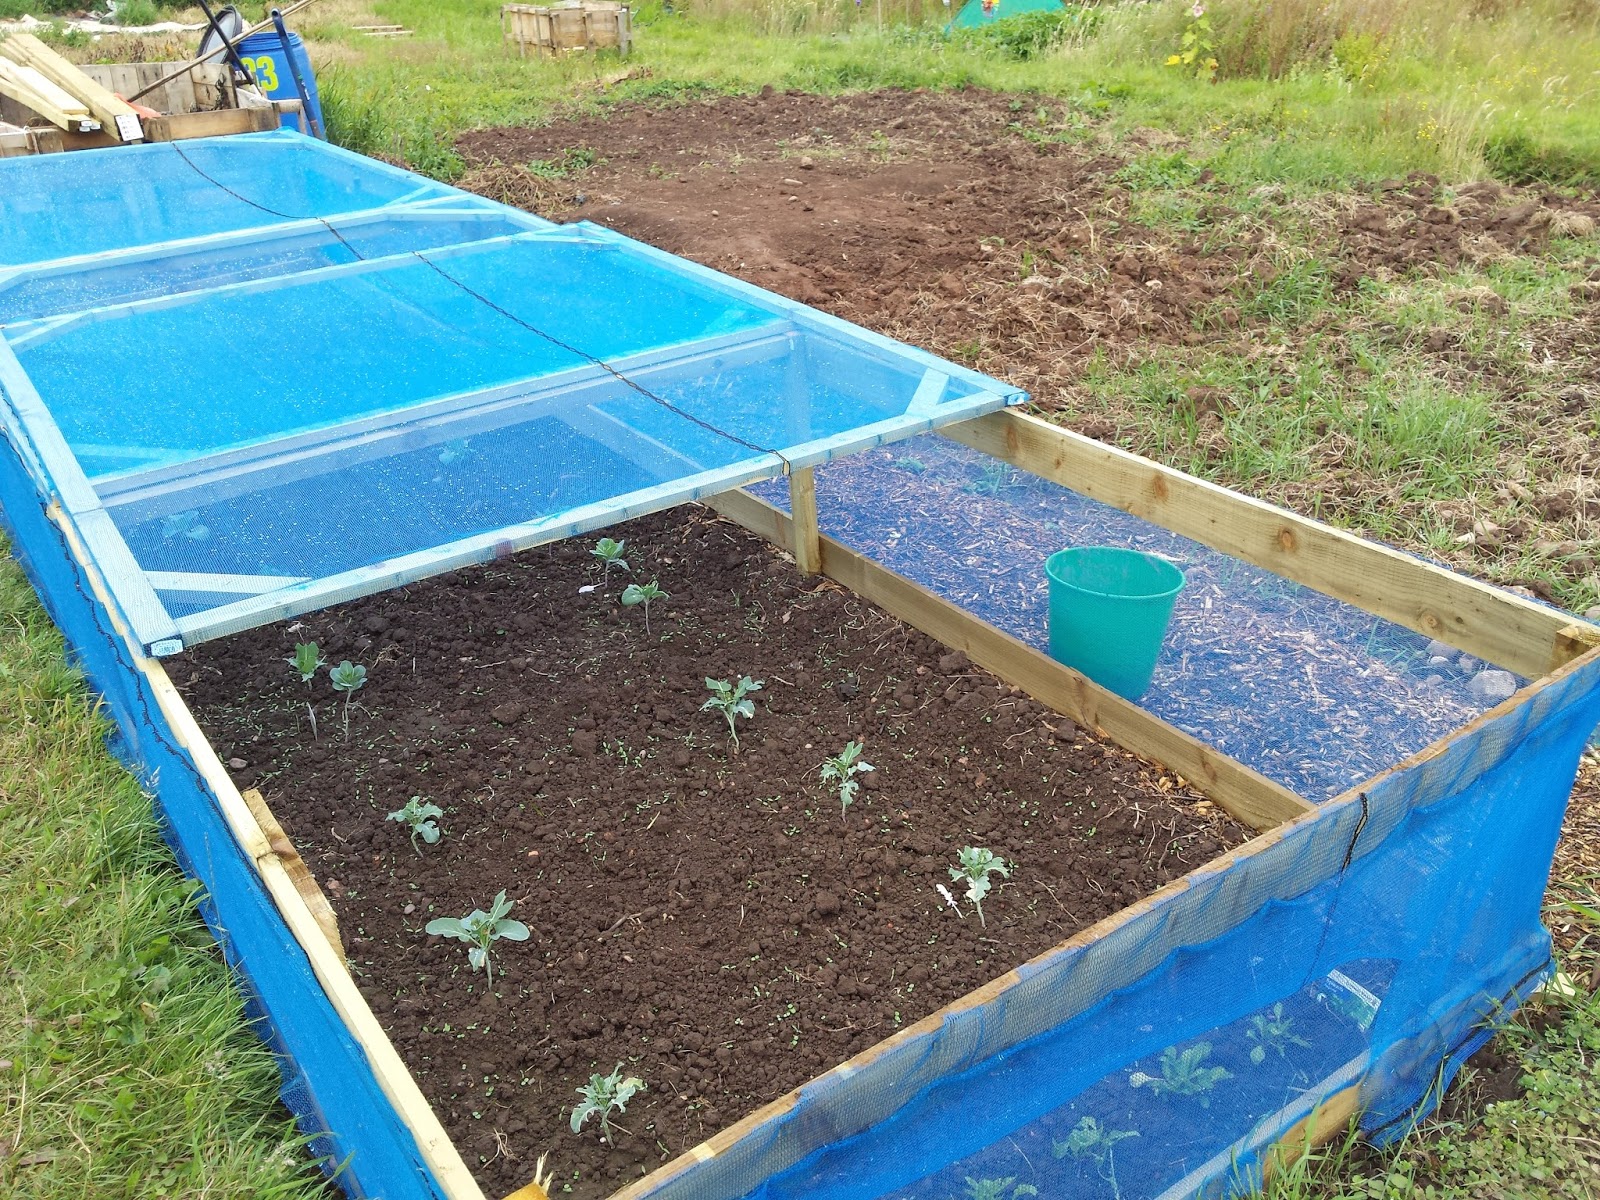
Here you can see how easlly it is to reach over and work the grow or pull the at the plants.  You can also weed it too and pull out any unwanted  visators.

Image 6

Monday 20 July 2015

Levelling out the allotment


Image 1


Image 2


Image 3


Image 4


Image 5


Image 6


Image 7


Image 8


Image 9


Image 10


Image 11