Monday 27 July 2015

courgettes magic

Take a look at this beauty.  Don't know where this courgette came from but I've been a little busy the last couple of days so have been unable to head down to the allotment and check on the plants development.  So this guy really shot out of nowhere for me on Sunday.  Really looking forward to cooking this bad ass elite
In the future I'll probably look into video's to show how and what I end up using/ cooking out of the veg fruit I grow.  Till then I'll leave you this image of a big juicy courgette.  
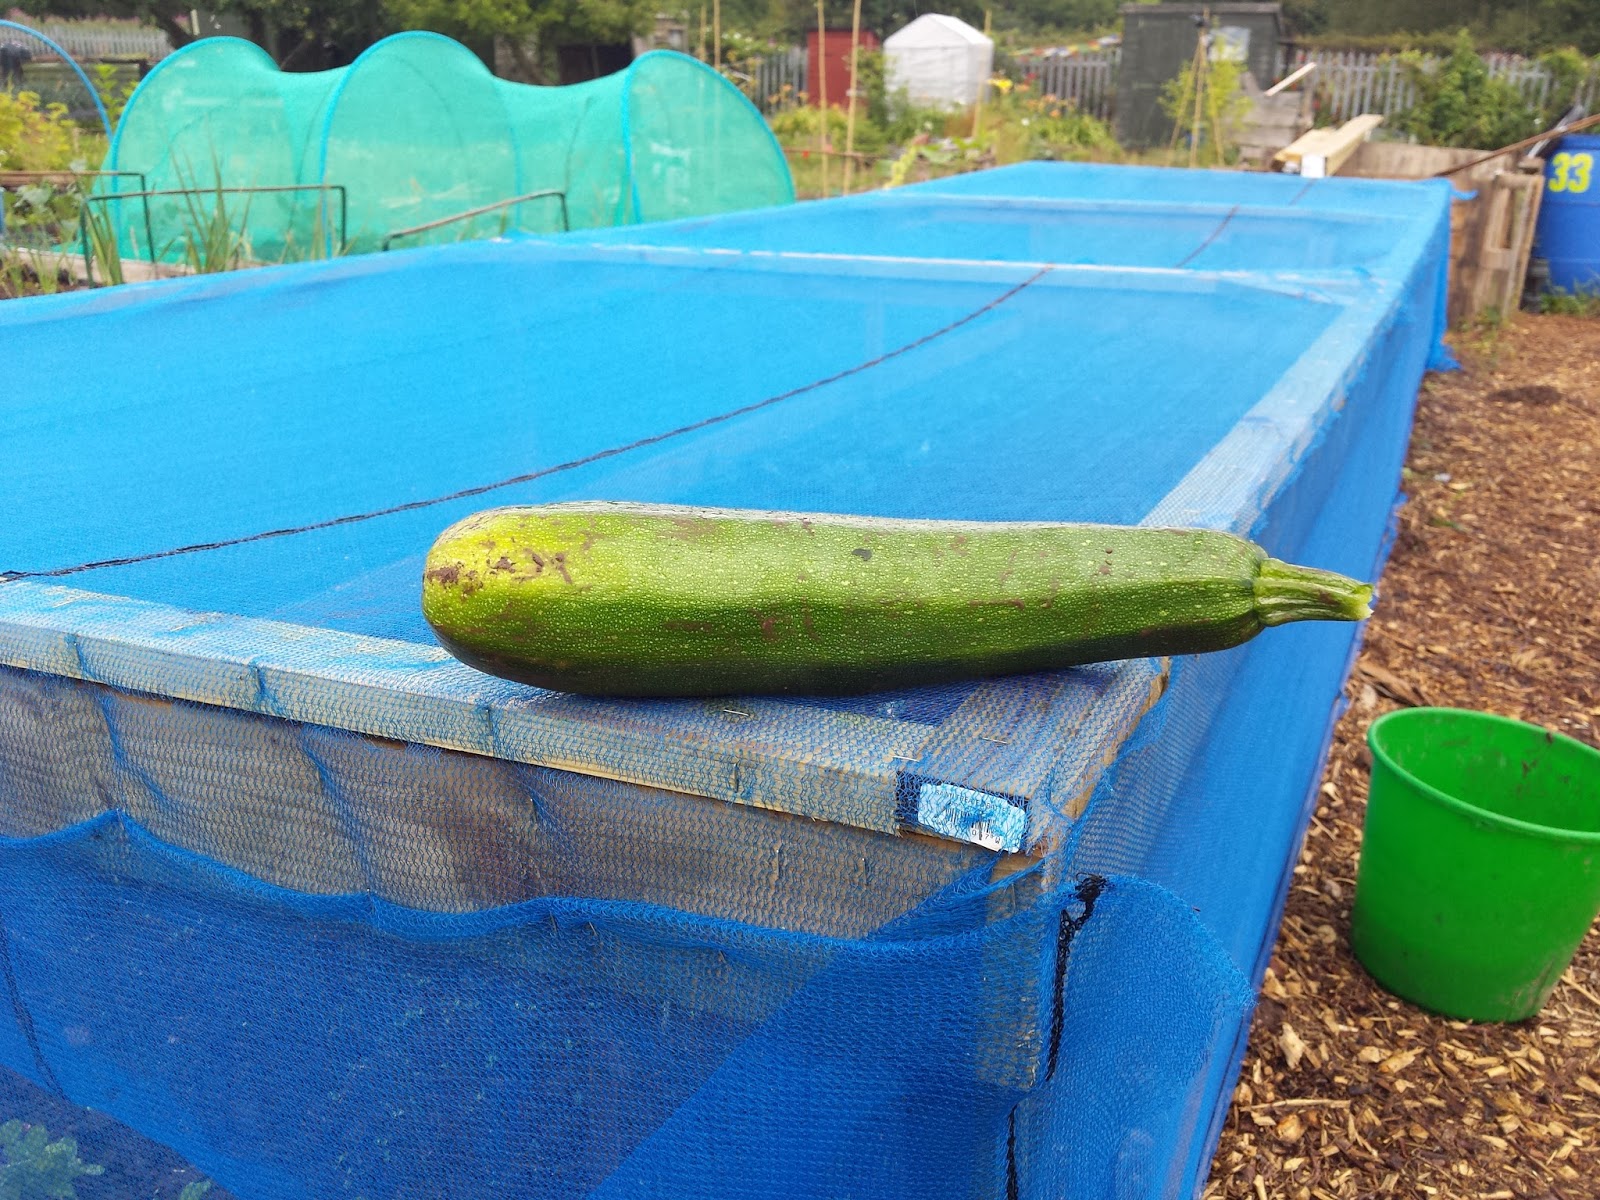
Image 1

One other thing to mention about courgettes is that it is better to pick the courgette once it has ripened or about 10mc long.  You don't need to measure them for the length just a rough guess will do.  However picking about so I read and been told three times a week help the plant throughout the year.  Keeping the plant strong and healthy.  So always keep an eye on the courgette.  

Potato's flower slowing dying

OK so I noticed this on Sunday if you can see the flowers starting to die so this hopefully could mean that the potato's are getting ready to harvest.  However there has been  something going around the allotment this year.

Image 1

But as you can see there is little sign showing of the plants wilted or that the leafs turning yellow.  That gives me a good feeling for our first potato crop.  I asked a fellow allotment grower on what he thought of the potato flower.  I've always been told that you should wait for the flower to completely die out.  That is the sign that it's ready to harvest.  So next time down the allotment I have a look and maybe I'll have potato's.

Image 2

Still levelling off the grown

So little to report apart from the levelling off of the allotment.  Still removing weeds as well as that never seems to end.  Also the rain started to come down on Sunday so hopefully I'll get the image to show how I've done so far.

Image 1 

Again with the weed just dig them all out and leave in the sun to dye out.

Image 2 


Image 3 

In image four you may just be able to see how the grown dips but it's not clear.  This however is the big job at the moment.  Once the whole area is complete and levelled off  the start to put in some more bed and lay out the paths.  

Image 4 

Image 5

Wednesday 22 July 2015

Bed netting frame

Ok here you can see the frame for the netting over the new growing bed, growing bed one.  Best to use a weather treaded timber if you want to be able to use this again for many years to come. 
Image 1

This won't stop weed but the birds have got no chance.  The frame it self has been design so that we can move it over to the next bed, for two reasons.  One is to cover what we grow on all beds as it can be pick up and move onto the next, for growing rotation.  Two is so that as we need to propare the soil for planetation it will allow us to work the soil without hindrances.  

Image 2

The frame is very simple, the main body is lengths of treated wood connect by beams strengthing the frame.  Not too sure how this will work when the wind builds up come autumn and winter.  The lead is again very simple beams of treated timber with another beam bridgeing the edges together.  That helps to strenghten the top frame when lifting it up.  There are three top frames to make it easier to lift up and reach into the bed.

Image 3

Image 4

Image 5

Here you can see how easlly it is to reach over and work the grow or pull the at the plants.  You can also weed it too and pull out any unwanted  visators.

Image 6

Monday 20 July 2015

Levelling out the allotment


Image 1


Image 2


Image 3


Image 4


Image 5


Image 6


Image 7


Image 8


Image 9


Image 10


Image 11


Getting out the weeds

This would be better as a video but slowly getting round to producing them at high production value. 
Anyway I'll get round to that later here is some advise for getting the weeds out of the ground.  Using a fork dig around the weed trying not to break the weed roots.  You can fork the ground and ratio the fork in the ground to loosen up the earth.  Allowing you to loosen and remove the earth around the weed root.  You want to make sure that you gig down to loosen the root allowing you to pull it out.

Image 1

Once you've pulled weeds out of the ground you can now do one of three things.  One, leave it out of the earth on a path to dry out in the sun to die.  Once the roots have dried out in the sun killing the weeds.  You can put them into your compost.  Now I've been told by many people saying that this is ok.  But by almost as many other people that you should not  throw the weeds into the compost.

Image2

Two, bag them up and throw them away with the rubbish.  Three, have a big bonfire at the end of the year making sure you kill the weeds.  Then I've been told that the you can throw the ash into the compost. 


Wednesday 15 July 2015

Path fisinhed

So I finished the path around the first bed and as you can see started it around the compost too.  I now lay the second bed out with string and once that is all dug over and the soil set for planting.  I use some more cardboard to layout the next and cover the card with wood chipping.  

Image 1

One other thing to remember with the wood chipping.  It's a good idea to make sure you pack the chipping in tight.  I just used my feet by walking side wards almost sliding along packing the chipping in.

Image 2

Image 3

Monday 13 July 2015

Path layout

So got some good advice on how to use cardboard as a weed suppressant for when to layout a path.  I'm not sure how good this idea will work in the long run but for a cheap path just to get it lay out.  Well to can not ask for more when it's cheap as weed suppressant sheets can cost more than the trip to a shop and ask if they've got any card board that they are going to throw out.  

Image 1

On top of the cardboard it is wood chippings that are delivered to the allotment site for free.  To be used by very one and anyone who needs wood chippings on their plot.  Not sure if that happens everywhere though so cheek with the allotment on what resources are on site.  Things like running water paths even a little shop to buy supplies so you don't have to run out every time you need something.  Though the shop on this site is only open on the weekend.   

Image 2

I'll need to get another image as the card was complete cover with wood chippings.  however I did run out of card to lay the path out with.  So I'll have to pick up some card from the local shops to start and finish this path.

New growing bed

Started to lay out the new bed for July growth which will be getting some spinach and cabbages. 

Image 1

So I've been forking the grow turning over the soil and removing the weeds out of the earth.  That may sound easy but getting the weeds right down to the roots which is time consuming.  There are probably still some weed roots in the soil but there will be easier to moving once they start shooting out of the ground. 

 Image 2

So once you gone over with the fork turn the ground over and getting air into the soil, making sure that there are no weeds.  There are probably still weeds, the crafty buggers don't go easily.  So now that the you've forked it all over it'd time to start using a hoe.  A Dutch hoe to be precise which you can use to really break the soil up getting even more air into the soil.  this helps to break the soil up so when you drop you plants into the ground it is easier for the roots to spread out under the ground.

Image 3

Once the allotment is better set up I'll start making some tutorials on how to use equipment and what there best for.  I am learning as I go along so any information I learn I will shear with the world all in good time.

Image 4

Image 5

Bamboo Pole tent

Ok started to grow some runner beans a French peas up the bamboo poles which are used as a cheap way of encourage the peas to grow up the bamboo poles 
Below in image one and two you can see how two bamboo poles are angled while one is place along the top.  The top bamboo pole resting on the top supporting the other two below.  allowing the poles to be tide together.  There is also a pole at each to steady the structure happening to make it more stable.
Image 1

You can also see some netting on the grow which has been lay down to try and stop birds getting at the plants.  This is not ideal but will do to later when we can get something to cover them better that won't inhibit the plants growth. 


Monday 6 July 2015

Strawberries

Image 1

The image 1 is when we first plants some strawberry plants that we're kindly given to us by another allotment grower on the same site.  For this year our first year we've put them into the ground, but next year with hopefully a greenhouse I hope to build a hydroponics system moving the strawberries off the grow and away from nasty little pests.  I'll post a video on how i go about building the system.

Image 2

In images two you can just make out a green net around the strawberry plants to ward off ant birds.  However this won't stop the slugs or little insect pests getting at them.
For that you slug pellets and I have to do some research for the insects.

Actual potatoes

Ok this is now going to be Monday updates for allotment progress.  So every Monday I will be updating anyone on my progress, what I've been doing/ planting, even how the allotment is looking.
Ok then last time If I remember right I thought that the potatoes had started to come through.  No I was grow as it was just grass.  Silly me.  But now you can see the potatoes starting to shoot up out of the ground.  This is a earlier picture of the potatoes starting their rise up out of the ground.

Image 1

You knowest an old CD attached to a stick just in front of the potatoes.  This is to reflect into the eyes of birds and act like the old scarecrow system.  I've been told birds no longer are scare of scarecrows anymore.  They mostly just laugh at them.  

Image 2

The image above image 2 is about a week apart from the top image (image 1), while image 3 is another week from image 2.  You can see how the potatoes shoot up quick, i can remember when they were just little spuds in a bag.  Anyway we've used string to mark out the area for the potatoes so that we know where to water. 

Image 3

In future post once I've learn more I start making video on how to plant potatoes for anyone willing to learn.


Image 4

Look how they've grown.  There are even little flowers starting grow on them, which is a good sign so I've been told.  Now all we have to do is wait for the flowers to start dieing which is the sign that the potatoes a ready to dig up.

Image 5

Something nice to see, two little lady birds taking some time out to get to know each other a little better.  I've also been told that ladybirds are good for your plants as they eat other insects that may like eating your plants.